Thursday, November 27, 2008

Assignment 1 CG2 : Final Step : Work it

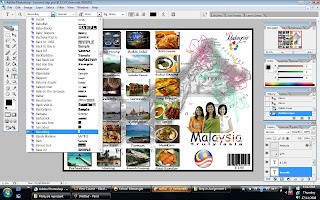
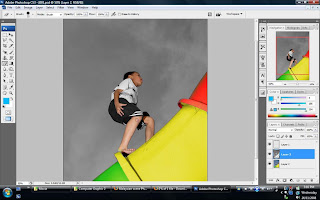
Here we go my first assignment that is a multi-cultural postcard.(i think so) I use everything i know about Photoshop. I assume i used. Some of the basic skills are like,layering,filter,marquee tool,type tool,drop shadow and so on.So,here,i show some screen shot of my in-the-making Malaysia Truly Asia Postcard.

Step 1:
I use marquee tool and select inverse selection to make a border around
the basic plain layer. Then,i use paint bucket to fill in the color that i chose.

Step 2:
I use eraser to erase the foreground of the hibiscus layer and
drag it to the basic plain white layer of my 8" x 6" postcard.

Step 3:
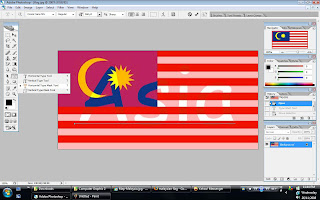
I took the picture of Jalur Gemilang and use the horizontal
type mask tool to cut a words to be use in the postcard layer.

Step 4:
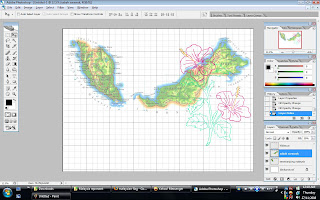
In this step,i use the same step that i use in the 2nd step. I erase
the foreground of the maps layer and drag it to the postcard layer.

Step 5:
Then,i took all the pictures that i will put in my postcard and change the
size and dimension of the layer so all layer/pictures will be in the same size.

Step 6:
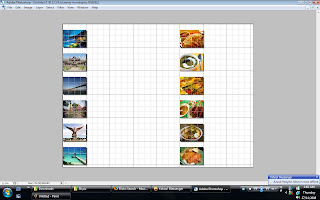
Then,i use layer>>layer style>>drop shadow and put a shadow
behind each pictures that i already drag to the posrcard layer.

Step 7:
Next,i use horizontal type tool to place a name under each picture.

Step 8:
Here i add the layer of the girls wearing traditional malaysian costume
and i use horizontal type tool to write the 'truly asia' word under
the Malaysia word that i get from using horizontal type mask tool.
I also drag the logo of Visit Malaysia and look-like flag of Malaysia.

Step 9:
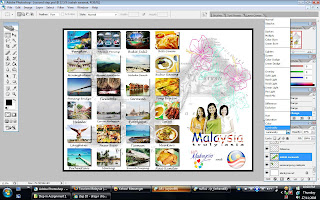
I use luminosity to change the look of the map and make it better.

Step 10:
I use the font name Barcoding and make a barcode
and add a price to make it look like a real postcard.

And...,Tadaa!!!
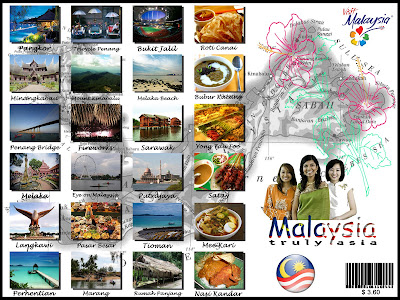
So,here is my multi-cultural Malaysia Truly Asia Postcard.Hope you all will like it
and vote for me. =) Please comment on my work. Thank you all. Peace and love.


-Med.
Wednesday, November 26, 2008

In-Class Exercise 2 - Kids are very naughty.

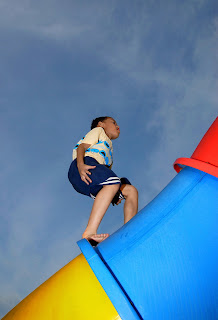
Yatta! (which mean,'yes' in Japan) I have done my second in class exercise.hehehe.so here is the picture that i have to edit and made some changes.

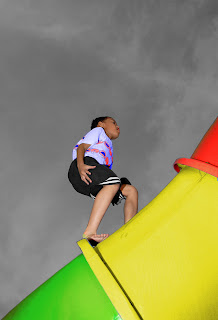
change to this

Tadaa!!!

The step in-the-making process:

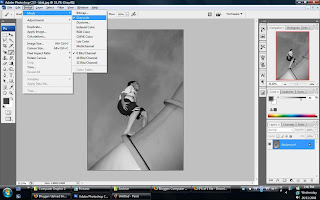
First step,i took the picture from the tutorial given and change it to
grayscale mode as shown in the tutorial video. Then,i duplicated
the other same picture and combine it in one layer.

Second step, i click on the colour (not the grayscale picture) layer and use the
Select>>Color Range
on the toolbar above to set the new color for the slider.

Third step, i use the Eraser tool or (E) for short keys to erase the grayscale layer on the
area of the kid's face,hand and leg to get the original color of the kid's skin.

After that, i make a new layer and change the color of the monster on
the kid's shirt.I changed it from blue to red color because i love
reds.Then, i change the kid's t-shirt's color to baby blue. Both tasks i
make a new layer and use the brush tool to change the color.

There you go.My second in-class tutorial exercise is finish.=))


Tuesday, November 25, 2008

Project Charter Assignment 1

Project Charter Assignment 1

Assignment 1 Title: Printout Postcard for the theme “Malaysia, Truly Asia”.

Project Start Date: 22 November 2008

Project Finish Date: 28 November 2008.

Project Manager : Mohamed Bin Abd. Aziz

HP: 017-3242311

Email: mcg1014.1061102442@gmail.com

Website: http://mcg1014-1061102442.blogspot.com/

Project Objective:
Students are to create a multi-cultural event for a post card. The theme would be “Malaysia, Truly Asia” which is the official slogan for Malaysia Tourism. Students are to show the multi-cultural aspects of Malaysia culture or life as a positive feature to attract tourist into this country.

Approach:

Write down how you create the postcard?
I use some basic skills and tools in Adobe Photoshop CS2.

Using what images?
I use some images that i took from the internet.

What tools at Photoshop you use to edit the images?
Crop,filter,rectangular marquee,paint bucket,burn tool,levels,curves,and some more basic tool that i learned in the tutorial videos.

Write here about the idea of your postcard, is it your own Idea or References (if you refer to someone else idea)?
I get the brilliant idea from one of my best friend. I will take the scenery pictures from all over Malaysia then combine it together in the postcard to make it a 14-in-One postcard.A postcard that contains all 14 different view from across the country.Plus with some edit and mixtures with some persuasive words to express the beauty in Malaysia.


Roles and Responsibilities:

Describe your time plan here. For example, you should at least show me 80% of your incomplete work on Tuesday 25/11/08 for me to comment. Fulfill Dr. Ken’s requirement. His requirements are as follows:

1. “Students are to submit the original PSD files (DO NOT FLATTEN THE FILE) together with the images used in the postcard. Call the file StudID_asssignment1.psd”.

2. “Place the files in separate folders. One folder containing the PSD file called Postcard. The other images used are to be placed in a folder call Postcard_ref”.

3. Print the postcard. Postcard size is 6x8 inches with 300 resolutions.

Comment: You can let me know the difficulty that you face. How enjoy you are in doing this assignment etc.

I really concern about the color management and the quality of picture after print it out.However, i learned a lot of new skills and experience using Adobe Photoshop CS2 .

Monday, November 24, 2008

Assignment 1 CG2 : Step 2 : Collection of subject Part 2

I will also add a few pictures of Malaysian food to show the multi-cultural in Malaysia.hehe.:DD


Sunday, November 23, 2008

Assignment 1 CG2 : Step 2 : Collection of subject

I already chose few pictures that i will use and combine together in my first assignment for my postcard. These are some pictures that i have chosen.


SO,above pictures are some pictures that will be in my postcard.I'm gonna use all the pictures above that i found in the internet and combine it together in the postcard.So,thats gonna be my idea. =)))

Saturday, November 22, 2008

Assignment 1 CG2 : Step 1 : References

I'm going to start my assignment 1 for CG2 soon enough.So,these are some pictures for my reference that i took from the internet.Some are the postcards that are use for represent Malaysia as for visit Malaysia year 2007 and 2008.Me,i am gonna make a new one and better that existed in the internet.

So,thats for now. I will update later for my first assignment. =)))
-Med.

Thursday, November 20, 2008

First and foremost.. [Tutorial 1]

Yeah.i have done my first in class exercise.Tutorial 1 teach me how to use a few simple basic tools in Photoshop such as selection tool,transform tool,simple efx using filter and drop shadow on the layer. I applied all those tools in this first tutorial.

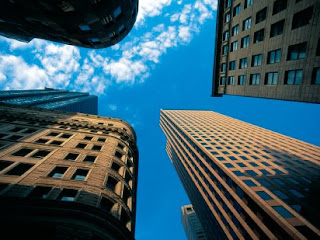
Three pictures given to be use in this tutorial:


Next,few step that i used in Photoshop to edit those pictures.

Step up:

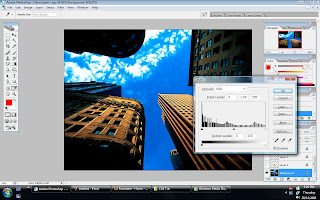
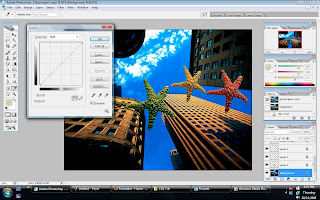
I use Levels to make the basic picture looks better.

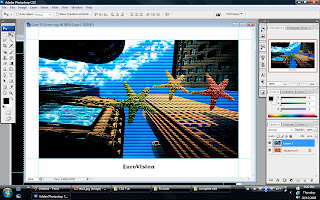
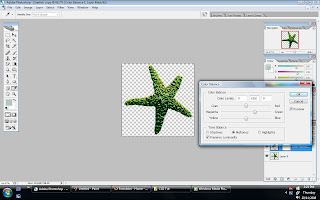
I use Color Balance to change the colour of the starfish. I make three colours for the starfish which is Green,Yellow and Red to make it look merrier.=D

Next,i drag all the coloured starfishs into the skiescraper layer.Then i use the Curves and adjust the brightness of the picture.


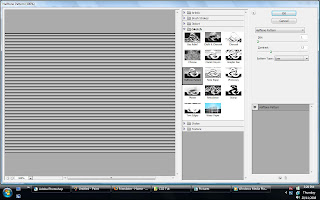
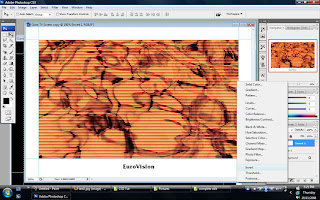
After that, i use Filter>> Sketch>> Halftone Pattern to put an effect in the lcd Tv screen.

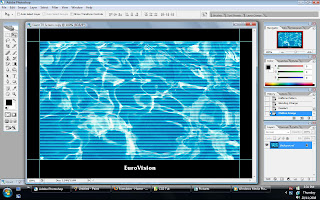
Tadaa,this is the outcome from the filter>halftone pattern.

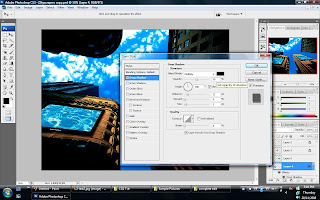
Below: Then,i applied Free Transform to transform the Lcd Tv and put it on the building's wall so it will look like it is patched to the wall.Then, i use the Drop Shadow effect to make a shadow behind the Lcd Tv.

The image above,i use Invert to invert the Lcd Tv to make it more beautiful.

Below is the result for the finish invertion.

Above: This picture is almost the final outcome.But,then i edit some part where i used Filter>>Sketch>>Conte Crayon. Below are the result of the effect that i used.

Below: I make the tv more detail and added some picture also in it.
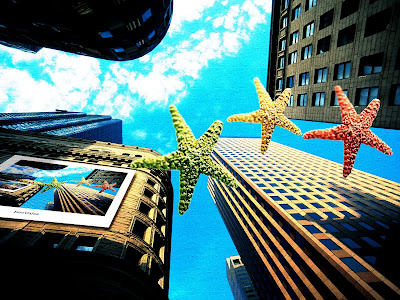
And at last,here we go!
Tadaa!!!

So,that is my final edit for the first tutorial for CG2.Hope to get a good comment from everybody.

-Med.