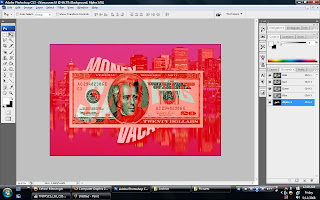
Yeah! I'm Done again.This tutorial 3 is quite hard for me. It really needs my patient and courage to finish this exercise. So,this is it. The pictures that will be use in this exercise 3:
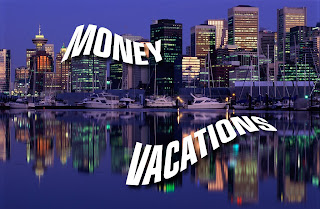
![](https://blogger.googleusercontent.com/img/b/R29vZ2xl/AVvXsEhA-91f9jvFjO1cuW_TouhBB9q8f7bPMxn7uvzjBTipQ50FD9eU-_pBumBtlbEzHE4HyIEc5Z3NEJ3z167xKLBx2afZ-PL1_XpMuRqraUtBL8CXo_spkss_C4tjZtAdSRCoXfG1FO3eJ5s/s320/Vancouver.jpg)
6 Magic Steps:Step 1:![](https://blogger.googleusercontent.com/img/b/R29vZ2xl/AVvXsEj9gpzM225_obNftrgrwHBcN9g9eQqoNJEzPmuyI0cmfs3QNMohDU2OvkrQ35mg6n9FJgXwG15q3YYihQxMzWj3Lfebo901CPp7n3qhM0wqbBjB2j2ZS0cXhELsbyy4nEhL9yPzEuLVeao/s320/step+1.jpg)
![](https://blogger.googleusercontent.com/img/b/R29vZ2xl/AVvXsEgNzoD1UMWHYlgBK39yffNHddZh6sa1EmdBJ4dHxEEyKJoYuznA6cZT8rZOPdIhzVX9KA3jv64n6r_sBHcWosLNupWfb8GHcyPgp3h6iJinGDNN9bsGktEfUlyalg0Y7rTTWHtyspgm02E/s320/step+2.jpg)
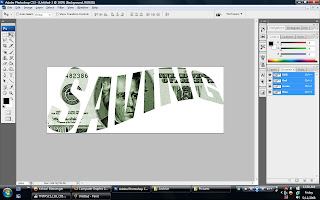
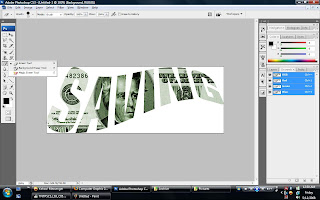
![](https://blogger.googleusercontent.com/img/b/R29vZ2xl/AVvXsEisEaqsCF__ODSy149ZlILEV0K_naEwporFWSnbAmxfwMNyKIfLTlgK5xR1qfc1lu3WzTZDOYB0Qtj6d9ZkMqHwWFv2P2-7hcKVYh-YRM9UgCnHjAPHU8HxiFeOZlo9pkOTyVmSSOzWUHo/s320/step+3+-+eraser.jpg)
I drag and combine all the pictures above and use
Masking effect.Then i use marquee tool to cut the 'saving' words and paste it in the new layer.
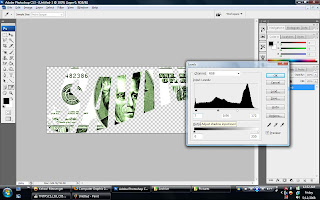
Step 2:![](https://blogger.googleusercontent.com/img/b/R29vZ2xl/AVvXsEjWQGpO4bQ6kM4bKm2-NWw0fjZVZq3S487YXw8MMfKnYqAbKk_ACeH9zKwywAfqlb74hEGTTNkEPlO5QXBV3M7Koopp7EmsQ4QN71-FqbTBS7_5r3HyByw8yPgmqzbmgW_kUCHJd5p5Vlo/s320/step+4+-+levels.jpg)
Then,i use
Levels to change the color level of the 'saving' layer.
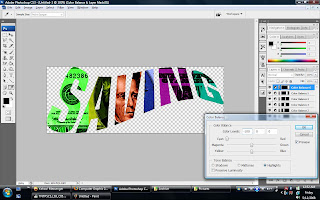
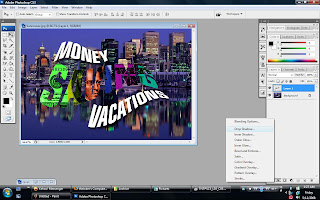
Step 3:![](https://blogger.googleusercontent.com/img/b/R29vZ2xl/AVvXsEgFAy2YU7LrR317YLGzkvX4zH74uY2hGNOIsF3VZf6QmnkNCUV8HFgfBkTMR2WCvVhJkPyy8oHZzlfWahBjUZNvwmzD7KrhuAQtXN7zo4ll03exATa1QaROqegNj-wnrTiRbA3xR9nOTKU/s320/step+5+-+color+balance.jpg)
![](https://blogger.googleusercontent.com/img/b/R29vZ2xl/AVvXsEhh1uyjN_eJczoxNt8ZsQVuGe_jXC1PhhZR88C243fQsG_hzeXvKjlwF4N_VRpK7DRUe8clj9FwC5I1JbyGWui_9yKCRIePkBYsJRfB3HruhXEko8sIS12WuKT64jQZsw2oRF8nxiXRU-c/s320/step+5.jpg)
This step,i use
marquee tool to select each letter and insert the color using the
Color & Balance effect to change the color of the words 'saving'.
Step 4:![](https://blogger.googleusercontent.com/img/b/R29vZ2xl/AVvXsEiMZ93CRwjdVd48uWytsno8UnuDdu6j8tiaxvyZHtYCmgWrapFA3tohyBTBHS-BBV6pxgYXFfdygDrN11pNhAbAVcQIL38OVFHGNECFvCeamFjKWQztZ-3kCKARdYV9Ua2UIjhMrj6IiUs/s320/step+6+-+drop+shadow.jpg)
![](https://blogger.googleusercontent.com/img/b/R29vZ2xl/AVvXsEjrzZ5_S9jJhBlvGa25YiRdiPQTWe_vXy3wObMbBiVQfXwH_T51UYISmeer3PkAXuOhxFbhMwNbvOnmD4y4BX4bBQDQgvqfpCtH3q_qaoSBHGxgf7RMgK2NvvgWzMzLZ9_U4tUHCj5WRXM/s320/step+6.jpg)
Then,i drag the words 'saving' to the basic layer and put the
Drop Shadow to the layer.
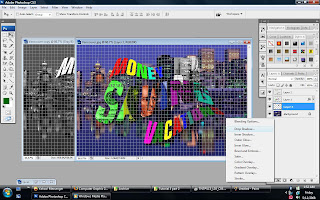
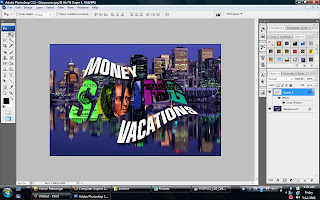
Step 5:![](https://blogger.googleusercontent.com/img/b/R29vZ2xl/AVvXsEiI7HE9PGpCPocdj16yFkAgageBud792tUWZB4OtioNPWuHW4N-5rIpjgnigmMnV3pRT-80PWkLc_UAaJWjIy7E2stpGD4wY7wlMsgicEbq9lesF38VveBCj9SUxOouUuek88UOPuDAW0c/s320/step+7+-+insert+color+by+magic+wand%2Bpaint+bucket.jpg)
I duplicated the basic layer and use the
Magic Wand Tool +
Paint Bucket to fill the 'money' & 'vacation' a color.
Step 6:![](https://blogger.googleusercontent.com/img/b/R29vZ2xl/AVvXsEhjPS3Ts6IvyfZ2W0Br1gWdlHV5Vd1BPO0mc-mnQiIA9azM2xm8rcFYOhdqnXyNN5q2wh0j58hZ4RlaqdF2cVS0gWluv1W_K8-WF4pKUQPERtwc7-rrC5ndwPLjubqWhBS3TEI5TTdryyw/s320/step+8+-+add+BnW+layer.jpg)
I also make another duplication of the basic layer and change the mode to
grayscale (Black & White). After that, i use Levels to edit a little bit of the layer's mode.Then,i dropped a shadow effect behind the grayscale layer.
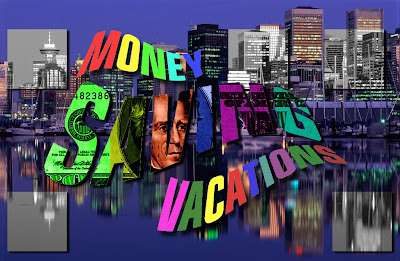
Tadaa!!!![](https://blogger.googleusercontent.com/img/b/R29vZ2xl/AVvXsEgJFKqU2YMDRVmUM_Su9KMPYeyGNmCR6HPyenfiunf5x1G6ekknVeyC2NjC-WzkB9Ws6MIJF1UTzftdheI7JictGQmbV1Lt8iv76gPKEUjUSauZzHGV0tVN6UipEjHD3tGdL6MJ02v5DCc/s400/done+tutor+3.jpg)
Finish suda! Hope this will satisfy madam Lydia and Madam gives me good mark.hehehe.tq all for reading.wait till the next exercise 4.
-Med.tJ
No comments:
Post a Comment